
I had 2 problems that I have been meaning to solve for quite some time. First, I hoard fabric. Second, I needed some reusable grocery bags. Every time I go to the store I am asked for my bags, please. I sheepishly respond that I need plastic bags. That is just no good. So, I finally got around to doing my part in helping out the environment, while using up my fabric stash! Win, win.

After much deliberation, I decided to use a freebie bag that I always grab first. This shape is ideal for taking my packages to the post office because its lightweight and has a boxy shape. If it holds boxes so well...it would be great for my groceries too!
Gather your standard sewing supplies and choose your fabric.
You need 3/4 of a yard of fabric...or scraps to cut out the following pieces.
Here is what you need to cut out ...
two pieces of 13" x 15.5" for the front/back panels
one piece of 10" x 43" for the side/bottom strip
two pieces of 3.5" x 20" for the handles

Your pile should look like this when you are done.

First, pin WRONG sides together (WST) of your 43" long side/bottom strip to one of your front/back panel pieces along the 15.5" side.

Serge.
(For all steps that tell you to serge, you may sew with a regular machine using a 1/4" seam allowance.)
*Remember to clip all of your threads as you go! They will get sewn in and show on the pretty finished edges of the bag otherwise!

Just trim away the smallest amount possible with your serger.

Open your pieces and press the seam flat to one side.
You have just finished one side seam of your bag.

Now take the same pieces, WST and line up the 13" side of the front/back panel to the edge of your 43" long side/bottom strip.
It will look like the photo above. Serge from corner to corner, starting at one red clip and ending at the other along the 13" edge. This is the bottom seam.

Open your pieces and press the seam flat to one side.
You have just finished one bottom seam of your bag.

Repeat the above steps again for the other 15.5" side, joining it to the edge of the 43" long side/bottom strip.

Open your pieces and press the seam flat to one side.
You have just finished the second side seam of your bag.

Repeat the above steps with your other 13" x 15.5"front/back panels, joining them to the other side of your 43" long side/bottom strip. Press as you go!

Now, we will encase the serged seam with a topstitch on our sewing machine.
(If you used a sewing machine instead, trim your seams down to 1/8".)
Since you pressed the seams, the next step will be nice and easy to sew together, without pinning.
Fold the bag along the seams, finished edge out so you are sewing RIGHT sides together (RST).
When you sew, make sure that you sew just OUTSIDE of the bump of fabric that is enclosed. If you do not sew on the outside edge, your serged seams will peek out. In the photo below, the stitch falls just about 5/8" to the left of the folded edge of the fabric.

Sew all side seams this way from the top of the bag edge down to the bottom.
When you have finished encasing and reinforcing the side seams, sew the bottom seams in the same way.

When you are done, the inside of your bag will be neatly finished and reinforced looking like the picture above.

Now on to our handles.
Fold one of your 3.5" x 20" pieces in half WST and press.
Repeat with the other handle.

Both handles are now neatly creased down the center.
Unfold as shown above.

Now take the long edge of one strap and fold it towards the center crease so the raw cut edge is almost touching the center crease WST. Press the newly folded edge without touching the center crease.
Repeat with the other handle piece.

Repeat with the bottom edge of the handle.
Repeat with the other handle piece.

With all edges folded in to the center,
fold the handle on the first crease that you made and press again so that all raw edges are enclosed and the outer folded edges are even with each other.
Repeat with the other handle piece.
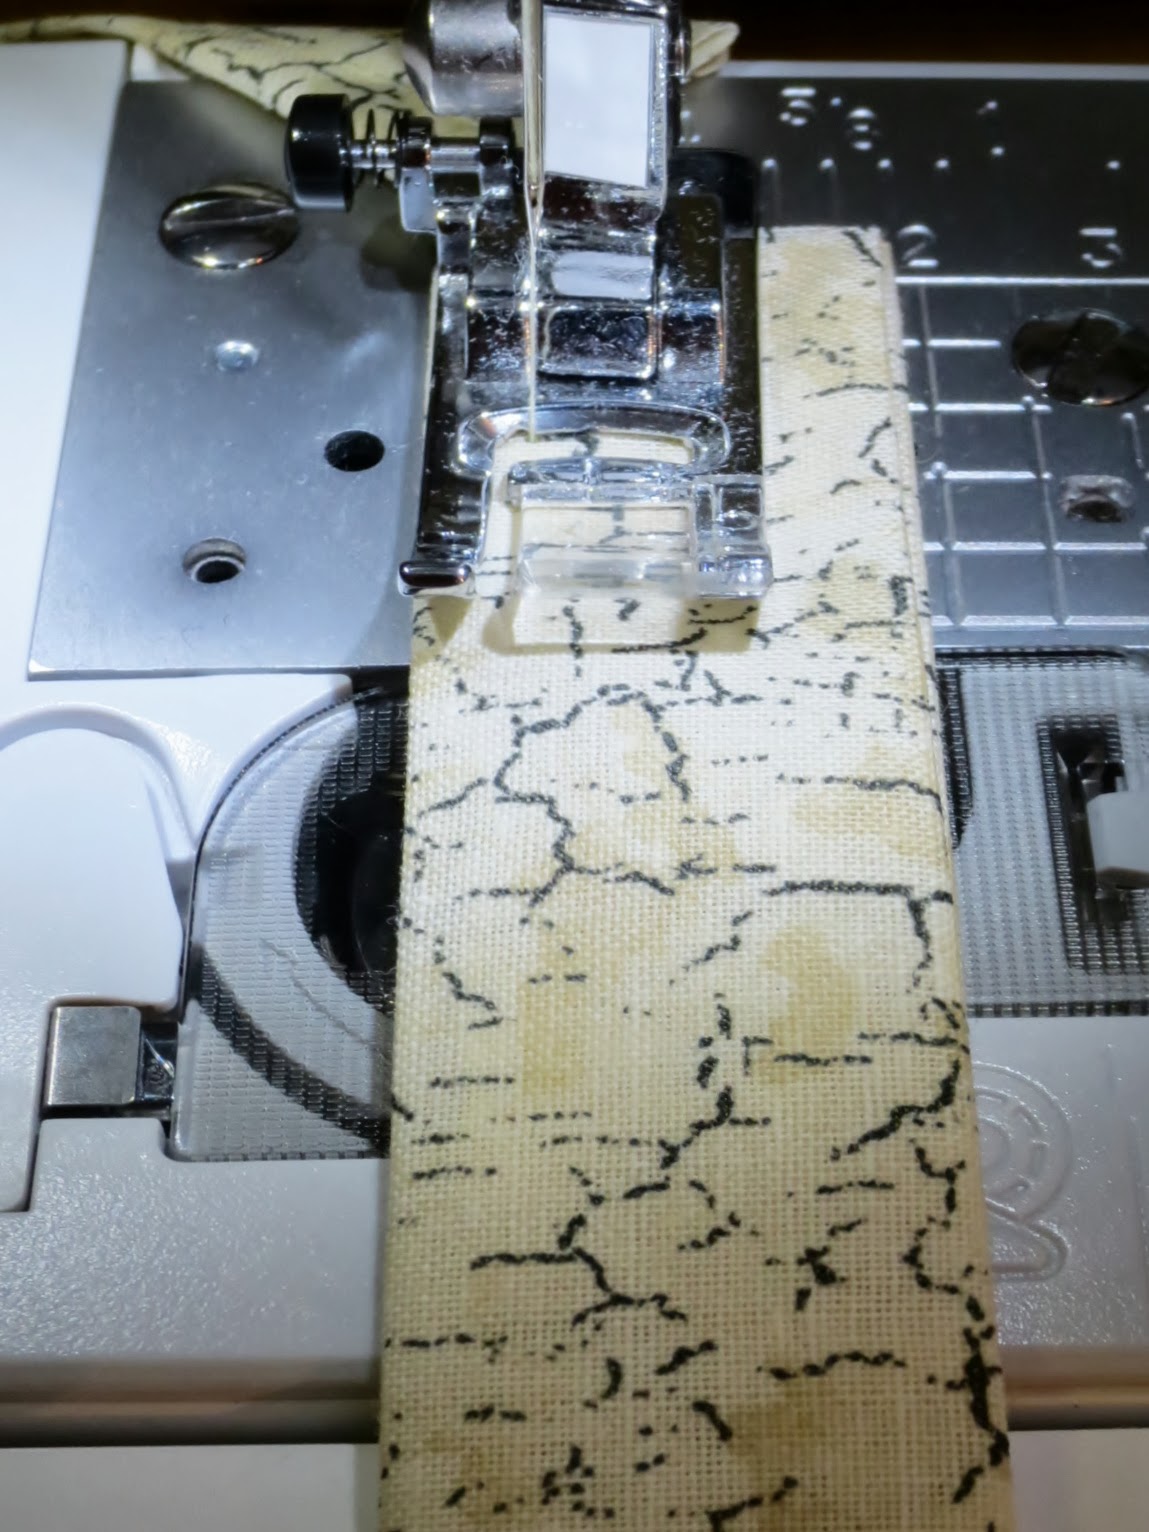
Topstitch along the edge of the handle using a 1/4" seam allowance.
Repeat on the other side of the same handle so that there are 2 rows of stitching along the handle, one on each side.
Repeat with the other handle piece.

Now we will pin each handle piece to the top of the bag along the 13" front/back panels.
Measure in 2" from the side seam to the edge of the handle and pin in place.
Make sure the curve of the handle is not twisted, and placed as sown above.
Repeat with the other handle piece on the other side of the bag.

Serge the top edge of the bag, trimming away the smallest amount possible with your knife.
You will tack on the handles as you go.
(If you do not have a serger, use a zig zag or overcast stitch to keep the fabric from fraying.)

Now, fold the top serged edge down 1" to the inside of the bag and press.

Pin the handles in place. Make sure they are straight!
Sew a nice straight topstitch along the serged edge of the bag all the way around the top opening. Be sure to backstitch at the beginning and end.

Now, you need to reinforce your handles so they look like the photo above.
Use a straight stitch to sew an "X" in the area where the handle overlaps the top edge of the bag.

As you can see in the photo above, the handle is just tacked on and not very sturdy.

Sew a straight line from the bottom corner of the handle edge to the opposite corner as shown above.
Remember to backstitch at the beginning.

Keeping your needle down in the fabric, lift the presser foot and pivot, or turn your fabric. Sew a straight line across the top edge of the bag, along the handle, as shown above.

Keeping your needle down in the fabric, lift the presser foot and pivot, or turn your fabric again and sew a straight line from the top corner of the handle edge to the opposite corner as shown above.
Remember to backstitch at the end.

Voilà!
You are ready to go shop with your sturdy, earth friendly new Boxy Grocery Tote.
Enjoy!


