
I usually don't jump on the bandwagon...but THIS fabric was too cute to pass up! I happened to get my hands onto some of this adorable Harvest Fox fabric from Joann's autumn inspirations line. I was so excited! Living in Alaska, I knew I needed to make this into a romper for baby V. She loves it too!

I used the Create Kid's Couture pattern Autumn's Peasant Sleeve Romper to make it!
This pattern is really great. It is easy to follow, easy to cut out and creates such an adorable boutique style outfit!
You can get the pdf here:
If you are a paper pattern type of gal, you can order this same paper pattern here:

So, as I was making this, I decided that V needed a cute rosette headband to match.
I used many of the boutique finishes that are showcased in the Create Kid's Couture patterns such as shirring and rolled hems!
Their tutorials are easy to use, and have great instructions, photos and diagrams.
Now, I just know you want to make one too... so let's get started!
You will need:
- One button for the center of your Rosette Flower
- One strip of fabric for the headband measuring 2" x 30" ( I used the fox print).
- One strip of fabric for the rolled edge rosette measuring 2" x 15" ( I used the fox print).
- One square of fabric ( I used the cream polka dot print).
- Thread to coordinate.
- 1 bobbin of elastic thread for shirring.
- Needle for hand sewing on the flower.
- Cutting ruler & Rotary cutter OR Scissors
- Iron
- Optional: Fray Check & Pinking Shears

Cut out your strips of fabric.

Cut out the square of fabric and set it aside for later.

Set up your serger for a rolled hem. TEST your settings first on a scrap piece until you like the finish.
If you want to record your settings for future use, save a scrap, and tape it to the free pdf print out in my other post here...
I have a Brother 1034d and here are the settings that I used...
You may need to adjust the settings on your machine due to variations in thread and fabric type.

Don't forget to remove the stitch finger too!

Take your 30" long strip and serge your rolled edge, trimming away 1/4" or less.
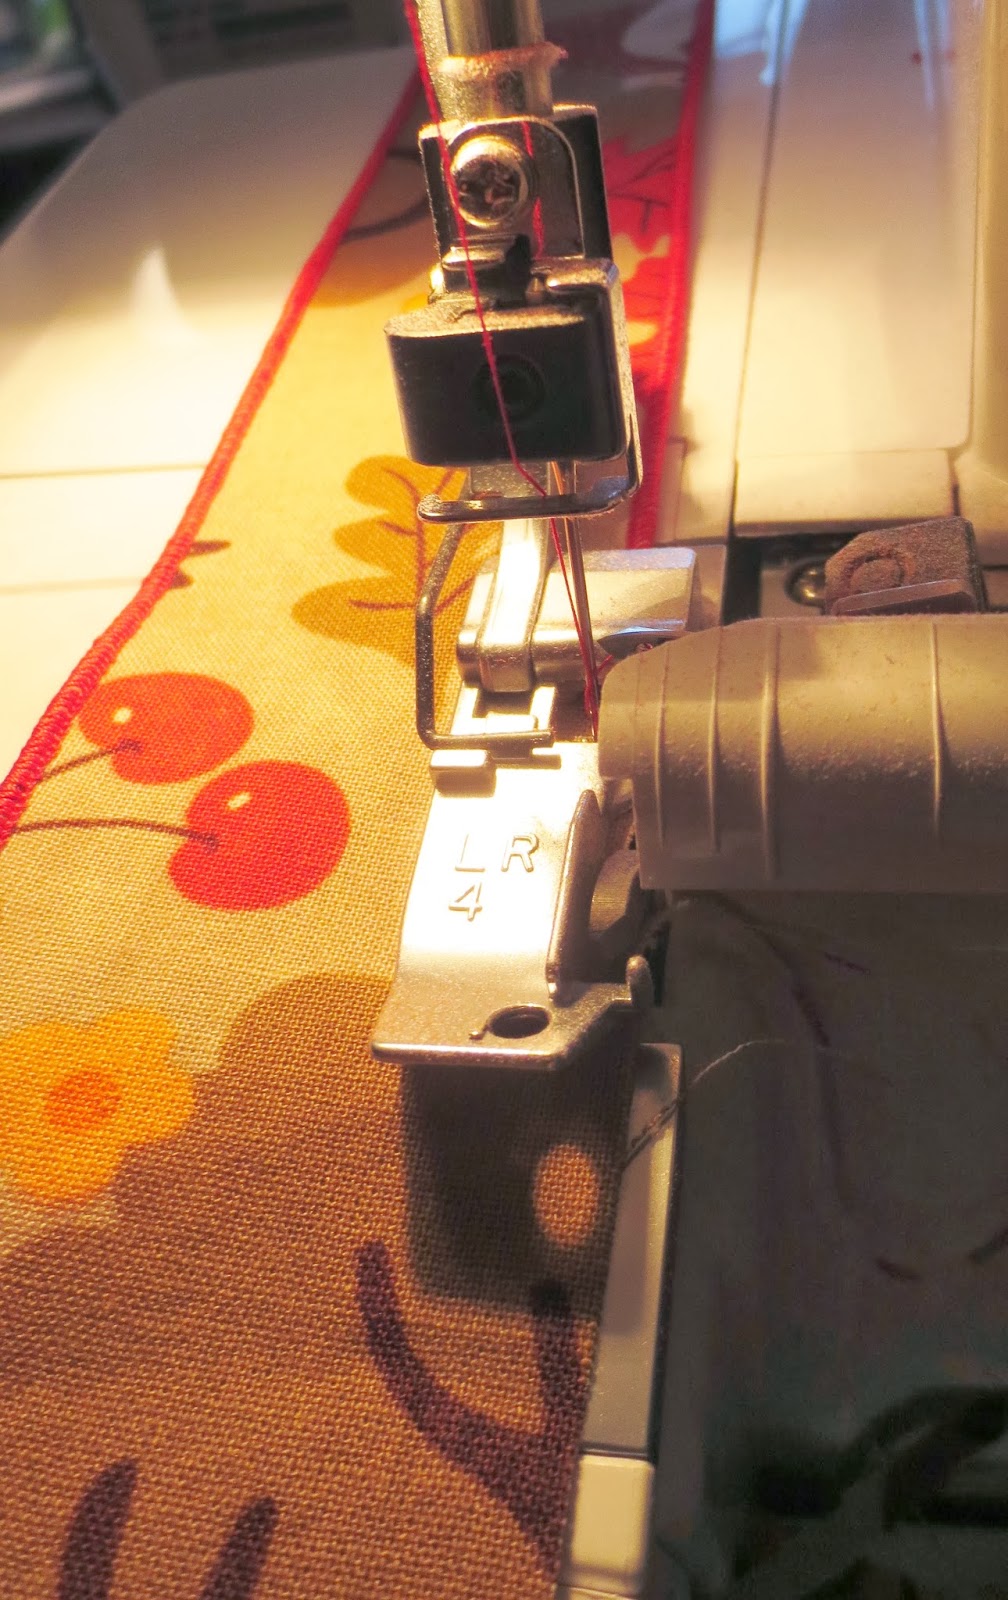
Repeat on the other side so that both long edges are finished with a rolled edge.
Repeat these steps for your 15" strip as well

Take one of the ends of your serged strip.
Mark a 60 degree angle on the fabric.
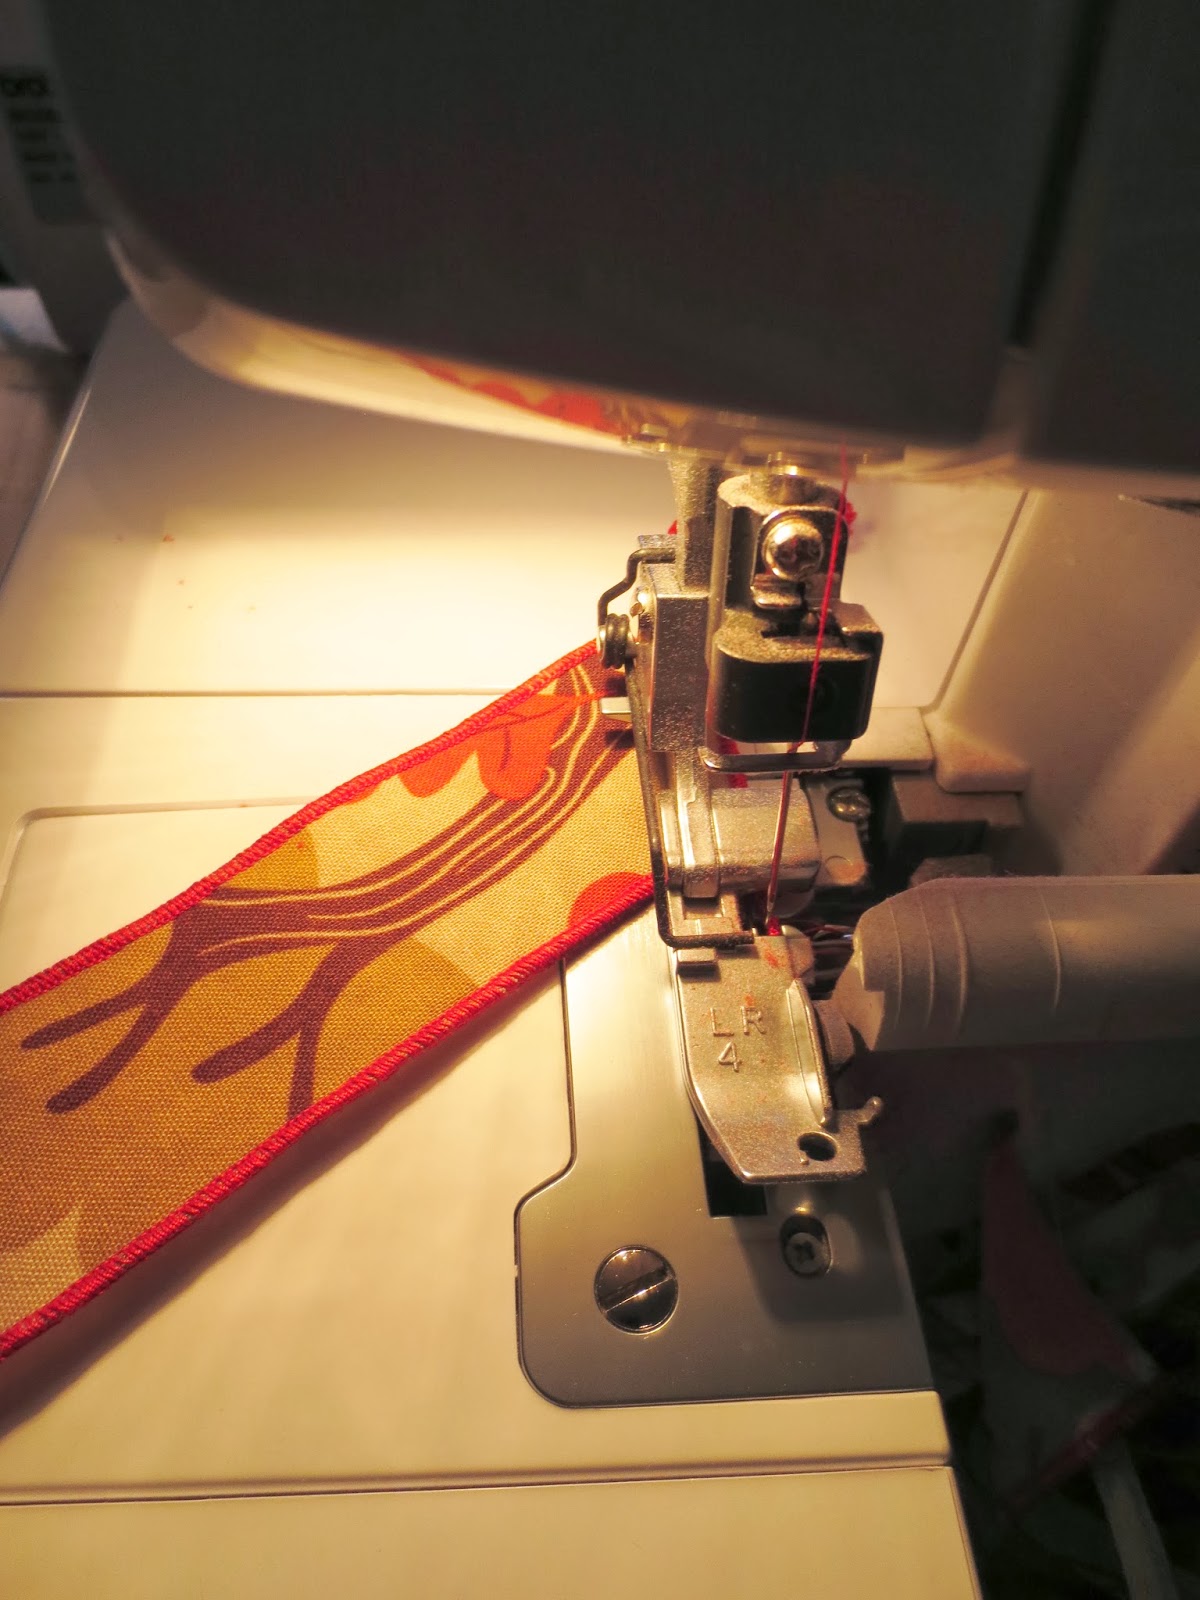
I will trim away with my seger the corner starting from the tip (where my scissors is pointing) to the pencil mark.
*NOTE: If you do not have a ruler with the 60 degree angle markings on it, just measure up 1" on the corner (to where the pencil is). That will give you about the same angle.

Serge from the corner tip to the pencil mark (right next to my finger in the picture).
Repeat with the other end of your strip 30 " long strip, and one end of the 15" long strip, leaving one edge on your 15" strip straight and not sewn.

The ends of your strips will look like the above photo.

Trim off the rolled edge tails and seal the threads with a drop of fray check.

We will now shirr the headband. Set aside the short strip.
Take your 30" long strip and mark (with pins/chalk) up 3" from the point on one end, and 4" up from the point on the other end, as shown in the diagram above.
You will be sewing 4 equally spaced rows of shirring IN BETWEEN these points, as shown with the red dashed lines in the diagram above.
Then the extra fabric "tails" will become a part of your flower cluster on the front.

See the 2 tails hanging down a bit on the far left in the photo above? That needs to remain un-shirred.

Now for shirring...
Wind the elastic thread onto your bobbin. I machine wind my elastic thread onto the bobbin, just like I do for any other thread.
Easy peasy.
When you load your bobbin into the case, make sure you manually slide the thread into the clip that holds the thread as shown in the photo above.

The settings that work best on my Brother PC-420PRW are a thread tension of 5 (Increased just a bit more than the usual setting of 3) and my longest stitch length of 5.
I did some trial and error to find these. It took me about 5 rows of shirring to find the best tension/stitch length ratio. I just stitched one row and gave my fabric a pull until I got the best stretch!
I get a nice strechy stitch using regular thread in the needle, and the elastic thread in my bobbin.
If you need more tips on shirring, check out this Create Kids Couture video on shirring...

Next, line up the edge of your presser foot about 1/4" away from your finished edge.
I put my presser foot right against the rolled edge.
You will need to hold the elastic thread when you start sewing.
Sew slowly the first few stitches and for backstitching.

Repeat the above step for the other edge.
Continue shirring this way until you have 4 rows of shirring, equally spaced apart on the length of your headband.

When you are finished, switch your bobbin back to regular thread.
Fold the wrong sides together and match up the ends of the rows of shirring (you should have this marked with pins or chalk).

Sew the short ends together, across the pinned/marked line.
Make sure you stitch over your shirring ends for strength, and backstitch at the beginning and end.

Steam your shirred headband.

Take the longer tail and flip it so that it is right side out and on a slight angle from the headband.
Run a few stitches across the twisted fabric to hold it.

Flip the short tail over the long one you just tacked on.
Tack it down if desired.
The tails that you just flipped and tacked down will become a decorative element to your headband, as seen on the far left in the photo above.
Set aside your headband.
Now we will make the rosette flower for our coordinating boutique headband.

Get out your needle and thread.
Double over a long piece of thread and knot the end.
Set aside your threaded needle.
Take your 15" long rolled edge strip and fold over the raw edge. Fold it on a slight angle and pinch the fold on one corner.

Now we take the top edge (the edge we are not pinching) and begin to fold the edge with the other hand to form a pleat.
As you are doing this, you want to pinch it with the 1st fold that you are holding.

Continue doing this and slightly turn the pleats in a circle as you go.

Think of the fabrics that you are pinching like the center of a bike wheel.
You want to pleat and curve the fabric in a circle, just like the spokes would fan out from the center.
If you look a the above photo, my 1st fold with the raw edge is just under the knuckle of my thumb, at the bottom of the fanned out pleated stack.

Continue to turn, pleat and pinch the entire length of the 15" long strip.

Take the bottom edge of your rolled hem and curl it under just a bit, as shown above.

Pin well...MAKE SURE to pin through all layers so the rosette does not unravel!
I decided to hand sew all layers together. If you choose to do this, be certain that your stitches are near the middle, and that your button will cover them!

Tuck under the point if desired.
Set your rosette flower aside.

Take your 6" square of contrasting fabric.

Fold it in half, then in half again so you have 4 layers of fabric.
It should look like a square from the top and like the above photo from the side.

Take your pinking shears and cut a curve from one point to the other.

Pink the straight edges also, trimming away just enough to separate the pieces.
Note: Armhole scrap pieces work great for this...just pink the edges!

You should have 4 pie shape pieces, like the one shown on the left.
Wrong side up, take the lower left corner, and fold it over the top right edge.
I like how the pie piece on the right is uneven.

Repeat the above steps for all 4 of your pie shapes.
Overlap the narrow points of 2 pie pieces, as shown on the bottom left.
Repeat with the other 2 pie pieces.

Overlap the narrow points of your pie pieces as shown above.

Set your Rosette on top of the pile of pie pieces.
Pin the center of the pie pieces onto the edges of the rosette.

Place your rosette across the shirred headband so that the tails are off to one side and can be seen.
Pin the rosette onto the headband in a few places so it does not shift while hand sewing.
Using a needle and thread, sew through the center of the rosette, securing the pleats and the pie pieces together. Keep your stitches in the MIDDLE of the rosette. When all pieces are secure, add the button to the center of the flower and sew it onto the shirred headband. Make sure that the placement runs along the headband so the tails are shown. Use a few stitches to secure the pie pieces if desired.

Voila! Your coordinating boutique headband is now complete!
This unique piece can easily be a part of your next Create Kids Couture pattern...Just make sure you cut out, serge you rolled hems and shirr along with your pattern! It saves time.

With just a few extra flips in the last folds, you can omit the button for more of a rose look like the rosette above.
I just have one question....

What DOES the fox say?!
Thanks for stopping by!


